UPDATE on June 2022 ;)
💙 1st thing
This square is now a part of #CrochetForPeaceCAL
hosted by two wonderful fiber artists
Yvonne van Zijl (@bokkyshome) and Alessia B (@alessiafiberart)
hosted by two wonderful fiber artists
Yvonne van Zijl (@bokkyshome) and Alessia B (@alessiafiberart)
💛 2nd thing - videos!
💚 3rd thing - some wording changes and more tips
💜 4th thing - Japanese translation by Masako (@crochet_hmmm)
So get your hook out and let's have some fun ;)
***
Happy Granny square day 2020 !!!
& just because I'm obsessed with duality lately I am presenting you with Yin Yang granny square! :)
You can also get it in pdf form on ravelry and etsy ;)
And as granny square day is one of my favourite holidays (thank god it is on actual holiday this year so I am not lying that much :D) I am sharing my latest square on blog for you all to enjoy!
Abbreviations used (US terms):
ch – chain
sc – single crochet
hdc – half double crochet
dc – double crochet
htr – half treble crochet (yarn over 2 times, pull yarn through 3 loops at the end of the stitch)
tr – treble crochet
dtr – double treble crochet
sl st – slip stitch
ch sp – chain space
st(s) – stitch(es)
bl – back loop
Instruction repeats:
[ ... ] - used for small repeats;
* ... * - used for large repeats.
Col – color
A – dark
B – light
C – background
While making YinYang sign we will repeat each of 2 rounds and 3 rows in both colours!
For Yin part start with col B for first round and col A for the rest.
For Yang part start with col A for first round and col B for the rest.
Stitches that attach Yin to Yang (and vice versa) are always worked in back loops.
3 stitches from both circles are joined in the middle on round 2 and additional 10 stitches from one circle are joined with those 3 rows from other side of YinYang.
I advise you to skim through all of the instructions before you start to crochet just so you know what to expect ;)
magic circle
Round 1 – Col A & B (worked in magic circle)
Ch 3 (counts as first dc), 11 dc.
Fasten off. Tighten magic circle.
(12 sts: 12 dc)
Round 1 – Col A & B (worked in magic circle)
Ch 3 (counts as first dc), 11 dc.
Fasten off. Tighten magic circle.
(12 sts: 12 dc)


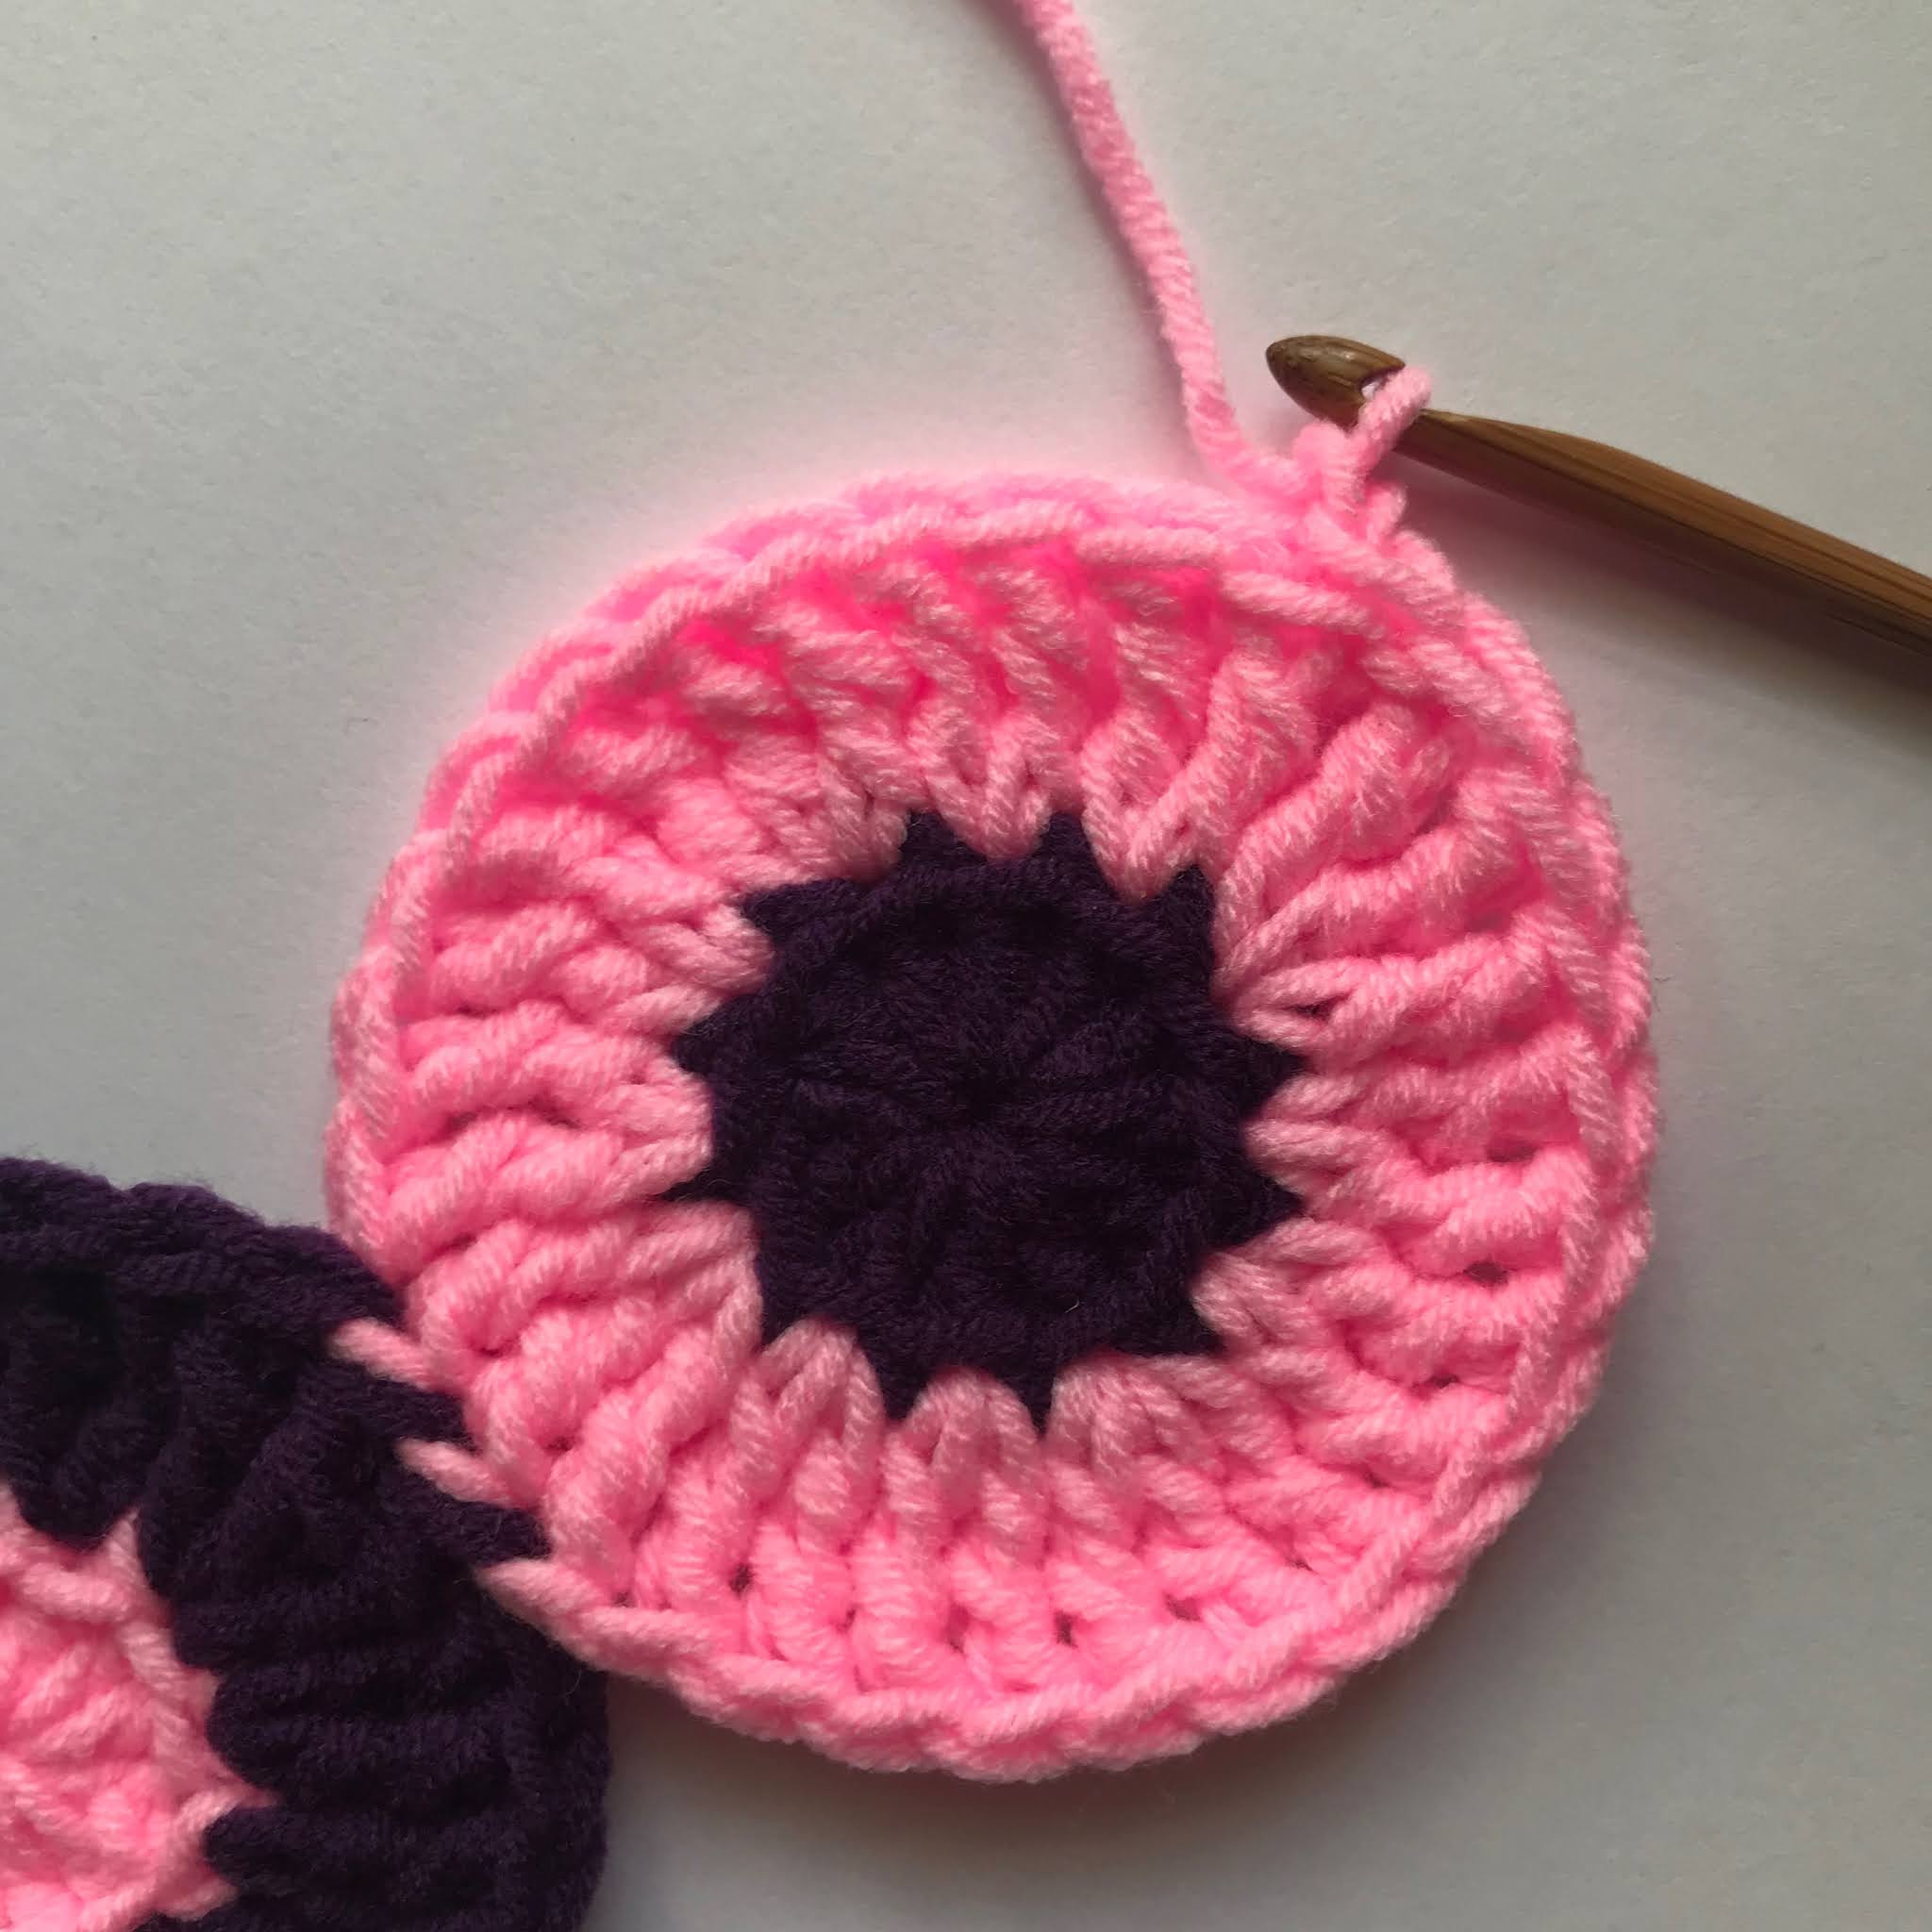
All stitches of this round are made in back loops (I say loops because I mean - 2nd and 3rd loop of stitch).
First tr a standing one.
[2 tr in first 2 sts, 3 tr in next st] 4 times. Sl st in first tr.
(28 sts: 28 tr)
When making second part of YinYang round 2 join to the first part!
12th, 13th, 14th stitch on the round you are making with the 12th, 13th, 14th stitch of the first part.
(Those are the second 3 tr's worked up in one st of 2nd round)


Ch 1, sc in next st, hdc in next st. Hdc, dc in next st. Htr, 2 tr in next st.
[Tr in next st, 2tr in next st] 2 times. Tr in next 2 sts. Make last tr stick to the other half of YinYang (sort of slipstiching the loops in every part of tr to the back loops of other part of yinyang, I hope pictures and video will shine the light on this).
(15 sts: 1 sc, 2 hdc, 1 dc, 1 htr, 10 tr)


Row 2 – Col A and B
Start with making sc in back loops of 2 sts of other half of YinYang (counts as dc).
Turn.
Dc in next two sts, 2 dc in next st, dc in next two sts.
One last weird stitch to make the curve – bunch of stitches worked together ..
Start making dc's in next 2 sts, hdc in next st, sc in next st (now you have 6 loops of yarn over your hook!). So lets finish this stitch. Pull yarn through 3 loops (you now have 4 loops on your hook), pull yarn through 2 loops (you now have 3 loops on your hook), pull yarn through all 3 loops (you now have 1 hook), and we have successfully finished the weird stitch! ;)
(7 sts: 6 dc, 1 weird st)
[2 tr in first 2 sts, 3 tr in next st] 4 times. Sl st in first tr.
(28 sts: 28 tr)
When making second part of YinYang round 2 join to the first part!
12th, 13th, 14th stitch on the round you are making with the 12th, 13th, 14th stitch of the first part.
(Those are the second 3 tr's worked up in one st of 2nd round)


Now we work in rows!
Row 1 – Col A and BCh 1, sc in next st, hdc in next st. Hdc, dc in next st. Htr, 2 tr in next st.
[Tr in next st, 2tr in next st] 2 times. Tr in next 2 sts. Make last tr stick to the other half of YinYang (sort of slipstiching the loops in every part of tr to the back loops of other part of yinyang, I hope pictures and video will shine the light on this).
(15 sts: 1 sc, 2 hdc, 1 dc, 1 htr, 10 tr)


Start with making sc in back loops of 2 sts of other half of YinYang (counts as dc).
Turn.
Dc in next two sts, 2 dc in next st, dc in next two sts.
One last weird stitch to make the curve – bunch of stitches worked together ..
Start making dc's in next 2 sts, hdc in next st, sc in next st (now you have 6 loops of yarn over your hook!). So lets finish this stitch. Pull yarn through 3 loops (you now have 4 loops on your hook), pull yarn through 2 loops (you now have 3 loops on your hook), pull yarn through all 3 loops (you now have 1 hook), and we have successfully finished the weird stitch! ;)
(7 sts: 6 dc, 1 weird st)


Row 3 – Col A and B
Turn.
Sc in first st. Hdc, dc in next st. Dc in next st. 2 htr in next st. [2 tr in next st] 2 times.
Dc in middle of last tr!
From now on all stitches go in bl of other half of YinYang.
Dtr in next st (stick the first part of dtr to next st on other half of YinYang).
Tr in same st you “glued” your dtr in (stick the first part of tr to bl of next st on other half of YinYang).
Dc in the same st you “glued” your tr in.
Hdc in next st, sc in next st, sl st in next st.
Fasten off.
(17 sts: 1 sl st, 2 sc, 2hdc, 4 dc, 2 htr, 5 tr, 1 dtr)


We have now finished YinYang and will make background rounds.
Round 1 – Col CSl st all around, where possible use back loops only.
Start where you would like your first corner to be!
(66 sts: 66 sl st)
(you can adjust your sl st count on that weird stitch we make on 2nd row. So if you make just 64 sl st instead of 66 like me all your corner stitches (2 dtr, ch 2, 2 dtr) will be made in one st. Otherwise 2 or more corners will be made over 2 sts like I did.)


Places where the corners will go ;)

Round 2 – Col C– all stitches of this round are worked in back loops of background sl st round and fitting sts from YinYang.
Sc in next st, ch 4 (counts as dtr), dtr in same st.
* Tr in next st, ch 1. Dc in next 2 sts, hdc in next st, ch 1. Sc in next 3 sts, ch 1 skip 1 st, sc in next 3 sts, ch 1. Hdc in next st, dc in next 2 sts, ch 1. Tr in next st. 2 dtr, ch 2, 2dtr in next st (every other corner is made over 2 sts!). *
Repeat from * to * 3 more times. On last repeat make just half of corner (2 dtr and ch 1) and sc in top of first dtr (this sc counts as ch but allows you to start next row from half a corner!).
(100 sts: 28 ch, 24 sc, 8 hdc, 16 dc, 8 tr, 16 dtr)


this video includes last 2 rounds ;)
And will end this square as if it was 7 round granny square – it should be the same size as well.
Sc around sc (the one we count as ch), 2 ch (counts as first dc), 2 dc's in same ch sp, ch 1.
[3dc in next ch sp, ch 1] 5 times.
* 3dc, ch 2, 3dc in next ch sp. [3dc in next ch sp, ch 1] 5 times. *
repeat from * to * 3 more times.
3dc in next ch sp, ch 2.
Sl st in first dc of this round. Fasten off.
(116 sts: 32 ch, 84 dc)


3rd round starts on 13th minute of this video
I would LOVE to see YOUR YinYang granny squares under the tag #YinYangGrannySquare and #CrochetForPeaceCAL
as well as #GrannySquareDay!
as well as #GrannySquareDay!
Happy crafting!
Hi, thanks for sharing your pattern. Needing some advice please. On round 3 I get as far as "DC in the middle of last treble" but when I try to "Glue" to the ying yang I'm getting a large gap between the two stitches. Where am I going wrong please?
ReplyDeletehi i dont understand this part in row 3:
ReplyDelete“ Tr in same st you “glued” your dtr in (stick the first part of tr to bl of next st on other half of YinYang).
Dc in the same st you “glued” your tr in.”
is it means, dtr-tr-dc in one stich? or per stich?